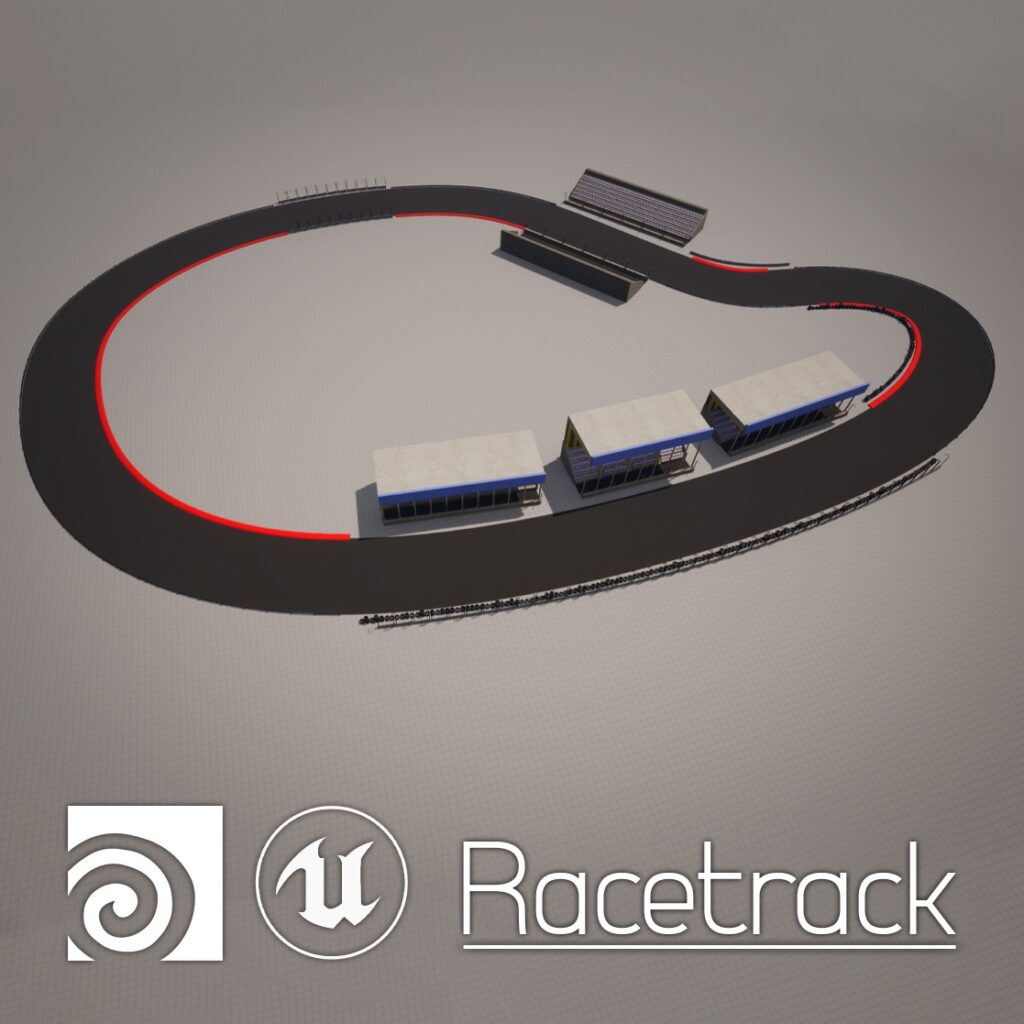
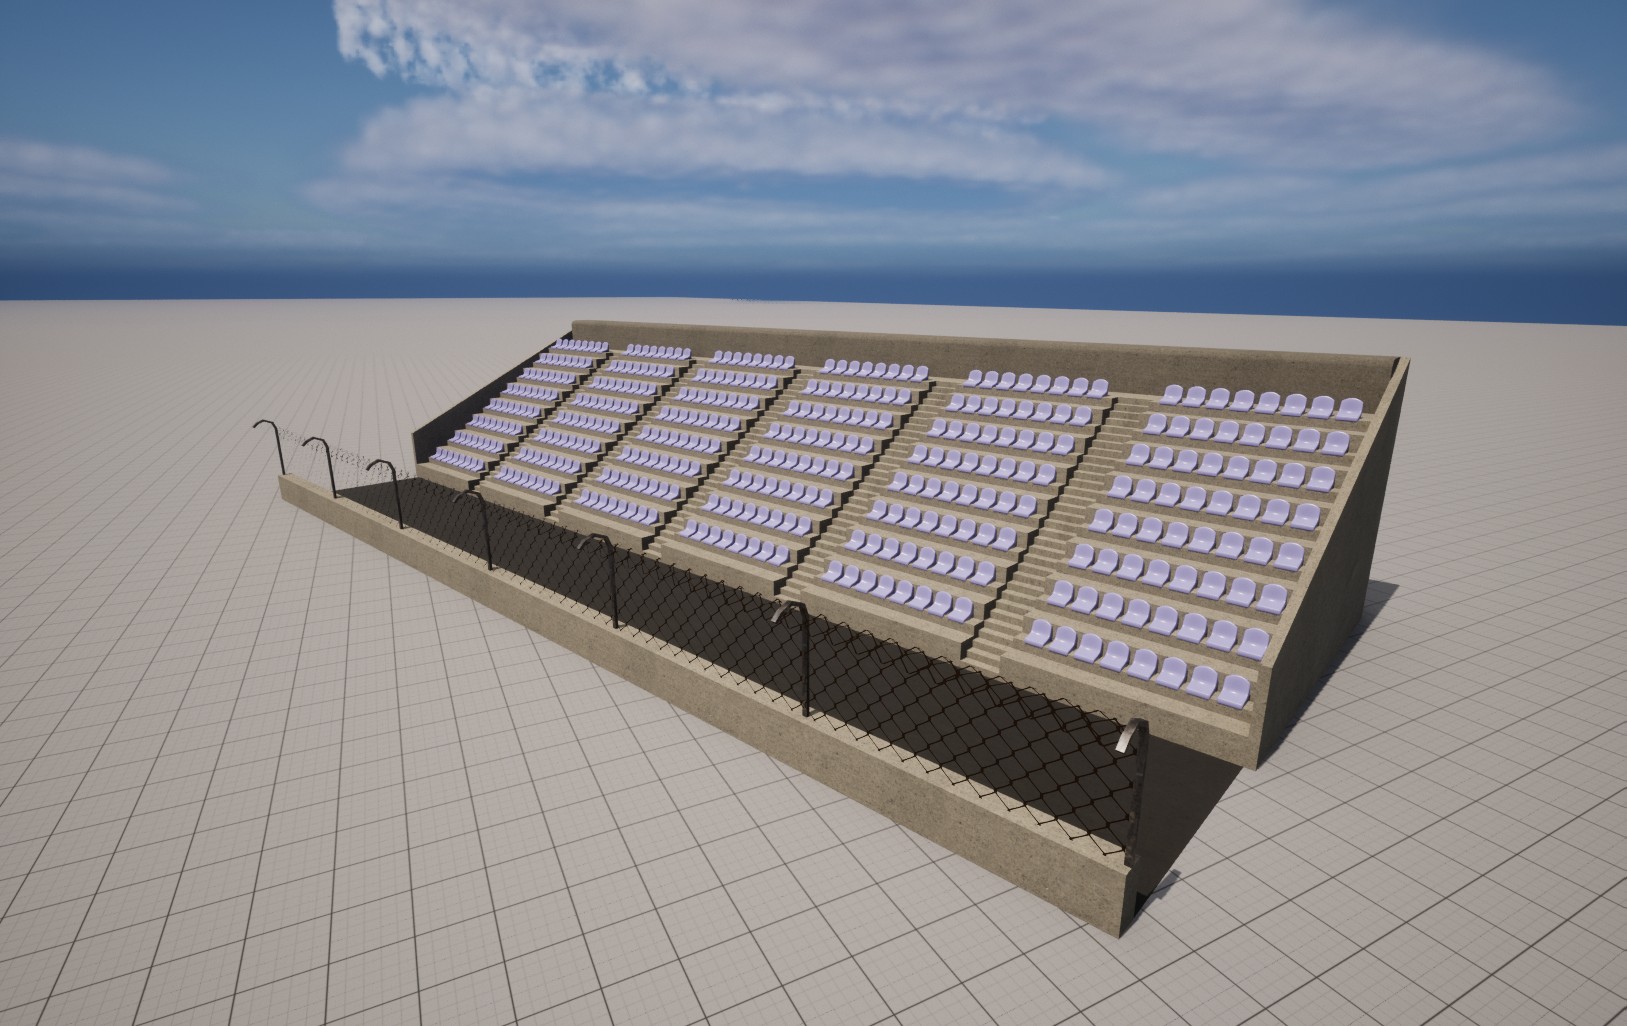
This blog post will breakdown the Grandstands from the Racetrack Toolset created in Houdini. You will be able to see the construction of the tool. I’ll also talk about the process and some problems I encountered throughout the project. Link to Portfolio Post here.
Construction
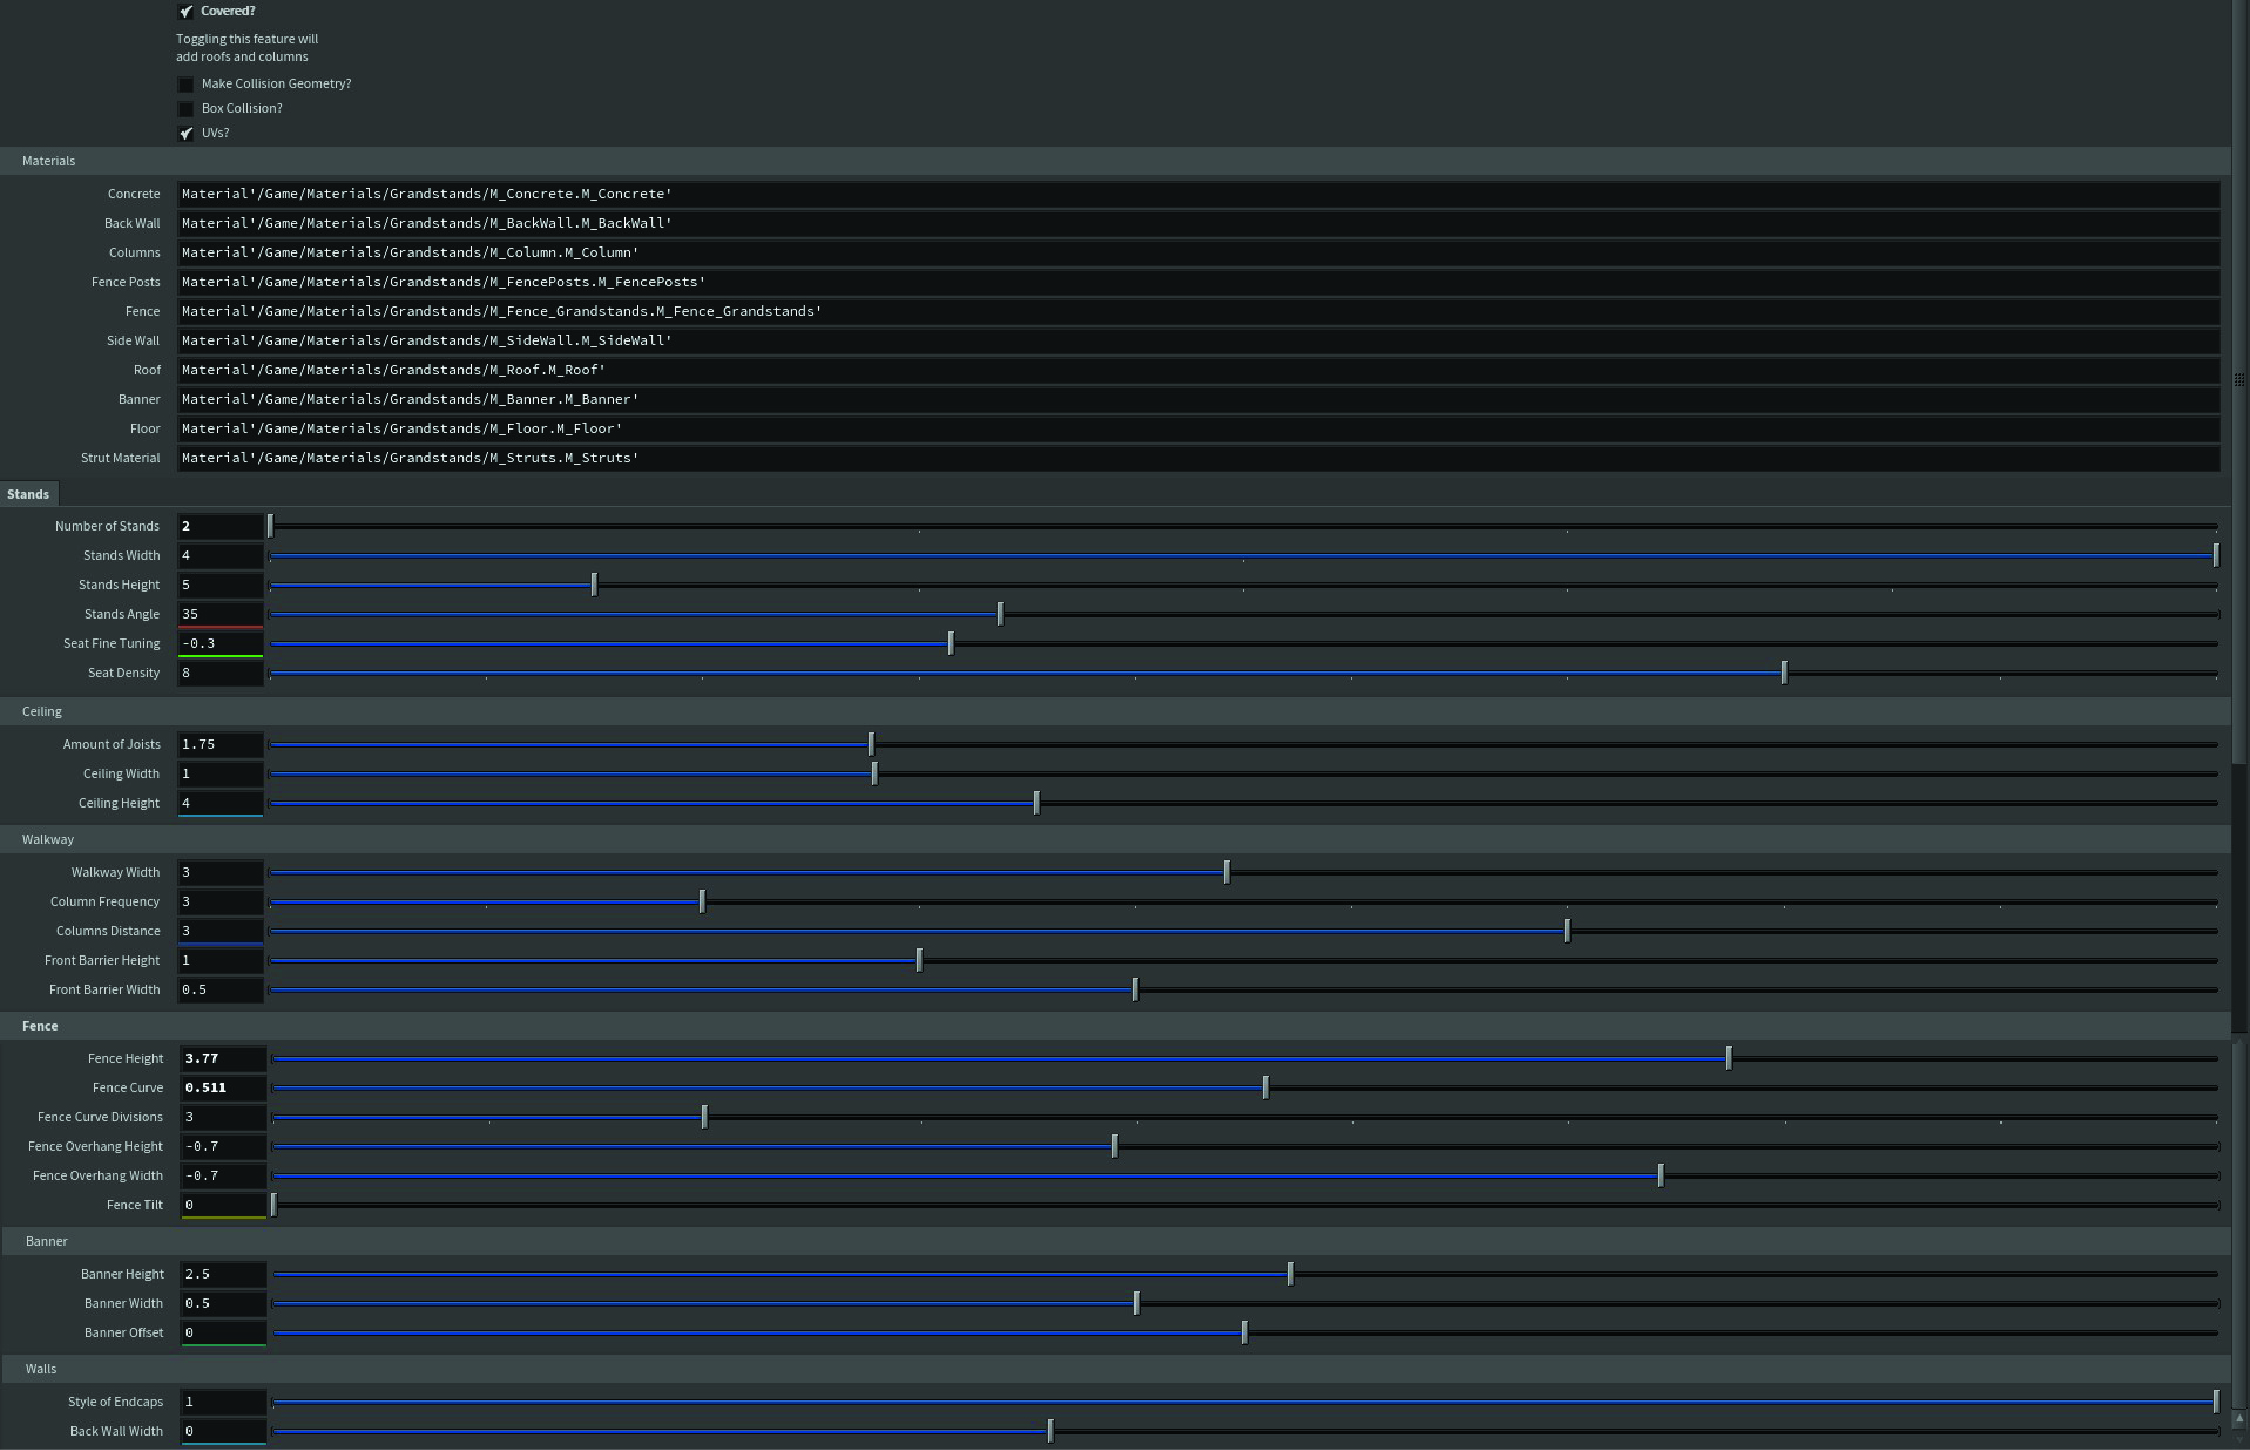
Here is a rough list of the adjustable sections:
Covered or Non-Covered, Height of Stands, Angle of Stands, Section Width, Walkway Width, Ceiling Height, Fences, Columns, Wall Style, Supports Frequency, and much more…
Collision
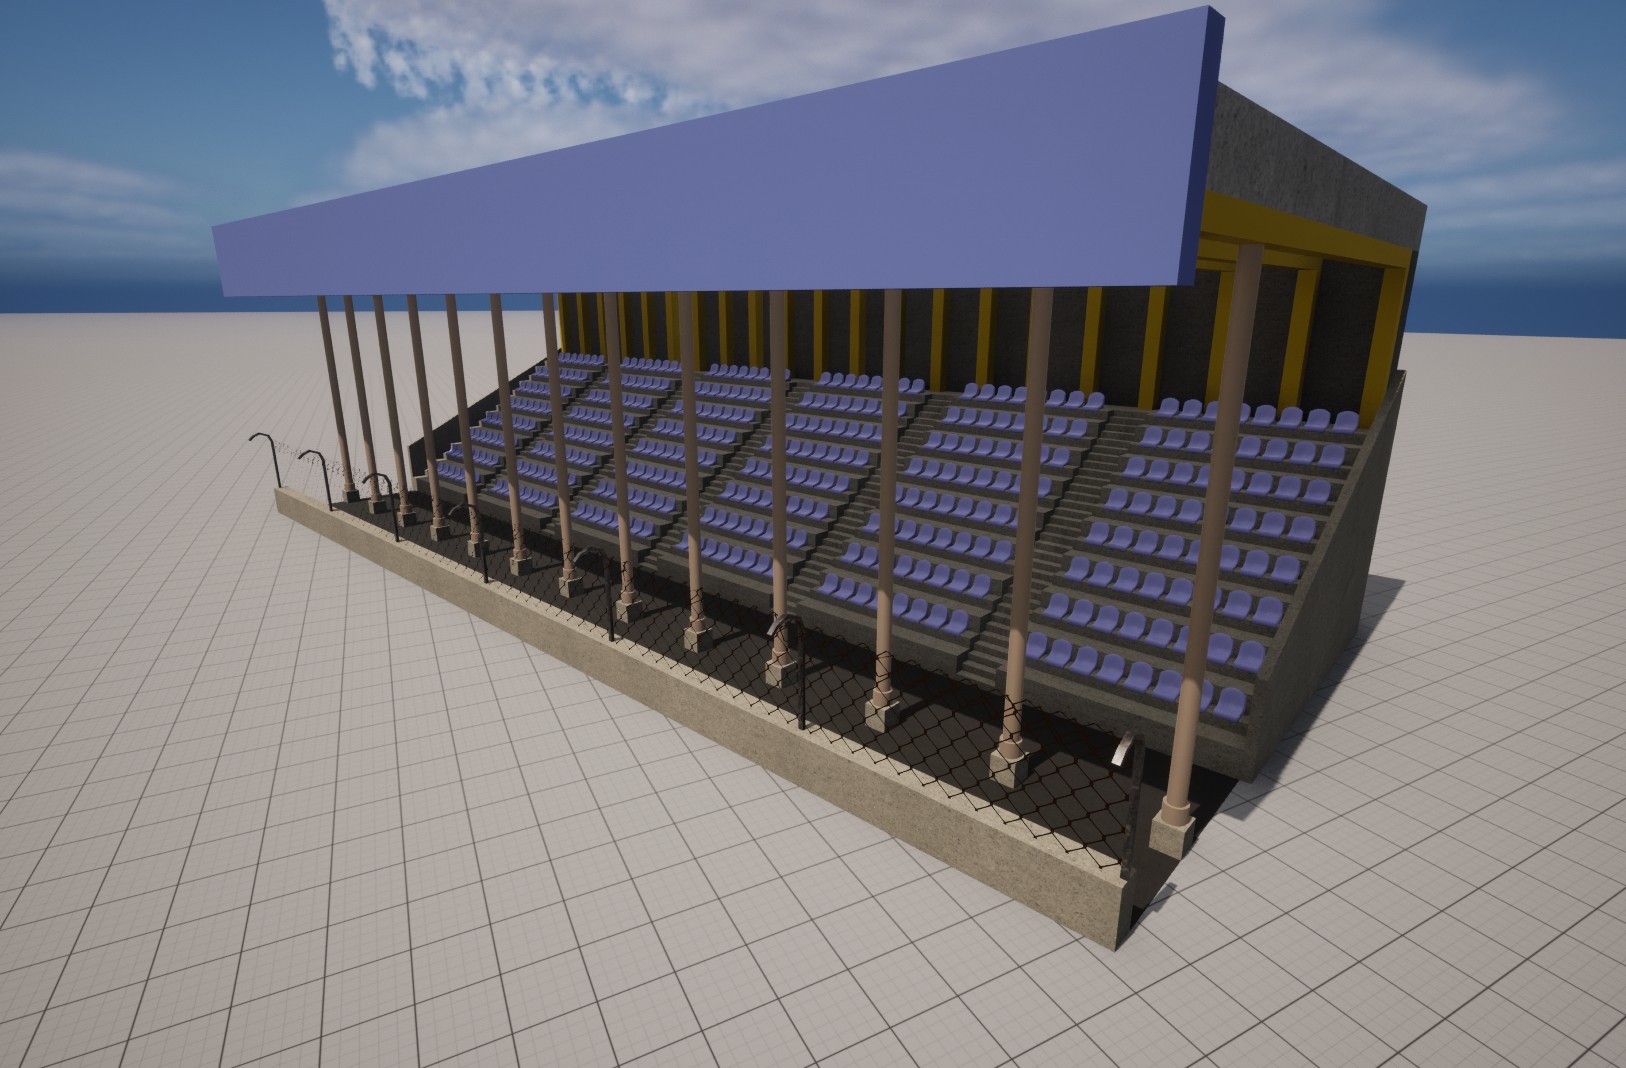
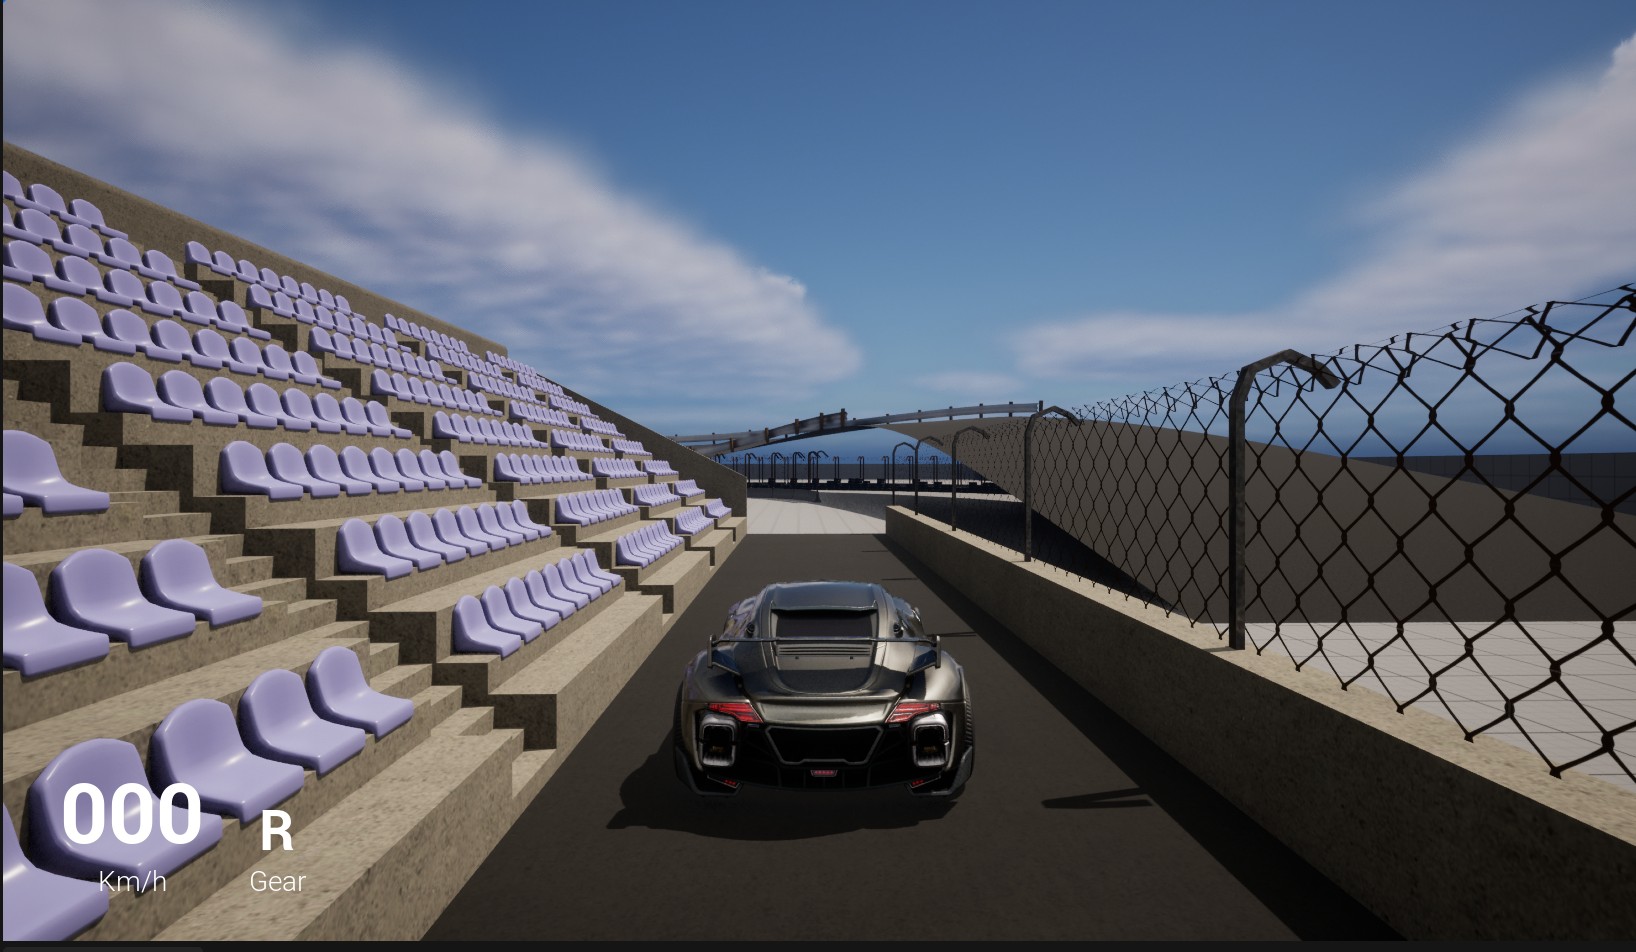
The tool allows for two different Collision styles, Complex Collision and Box Collision. You can also turn off collision entirely.
Complex Collision means that each section has collision, this allows players to interact with the stands up close. You are able to drive through the walkway and walk up the stairs.
Not every grandstand needs to be interacted with up close, in cases like this you can use Box collision or no collision at all. Box Collision creates a collision box around the volume of stands.
Texturing
Like every other tool in this toolset the materials are automatically assigned in Unreal. In total there are 10 materials that are assigned in Unreal. The stands use UDIM tiles for the UVs. In total there are 5-7 UDIM tiles depending on the style.
Problems Encountered
While working in any 3D program there is going to be frequent problems. Luckily using Houdini’s node based system they are often easy to identify and the problems are usually confined to a single node. But sadly that doesn’t prevent hair pulling issues that make you reconsider your occupation.
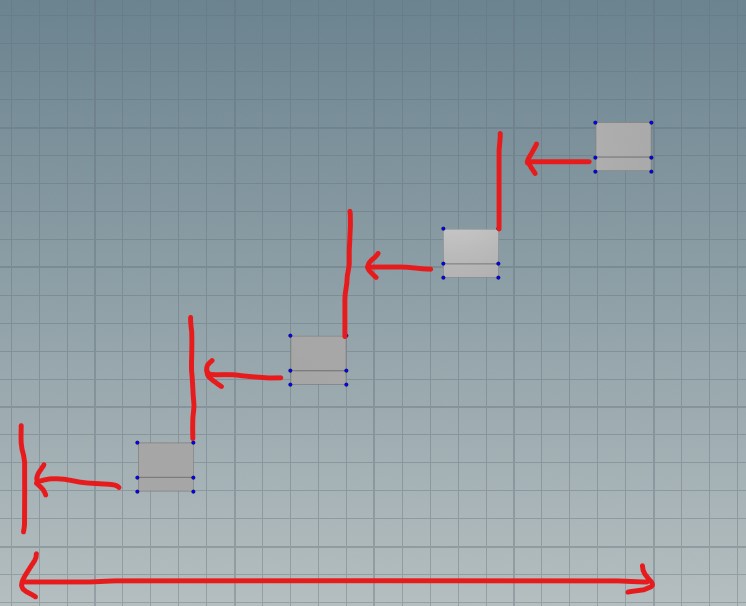
Creating the Rows
Wow this one was a tough. The task was creating a system that would allow me to create the stands in a way that I could dynamically adjust the height, width, and angle.
The entire system is build off of a single grid. This grid is where all the factors above are adjusted. The row system is built off of instancing a dynamically adjusting model to each point in the grid. Getting these to dynamically adjust was the big problem.
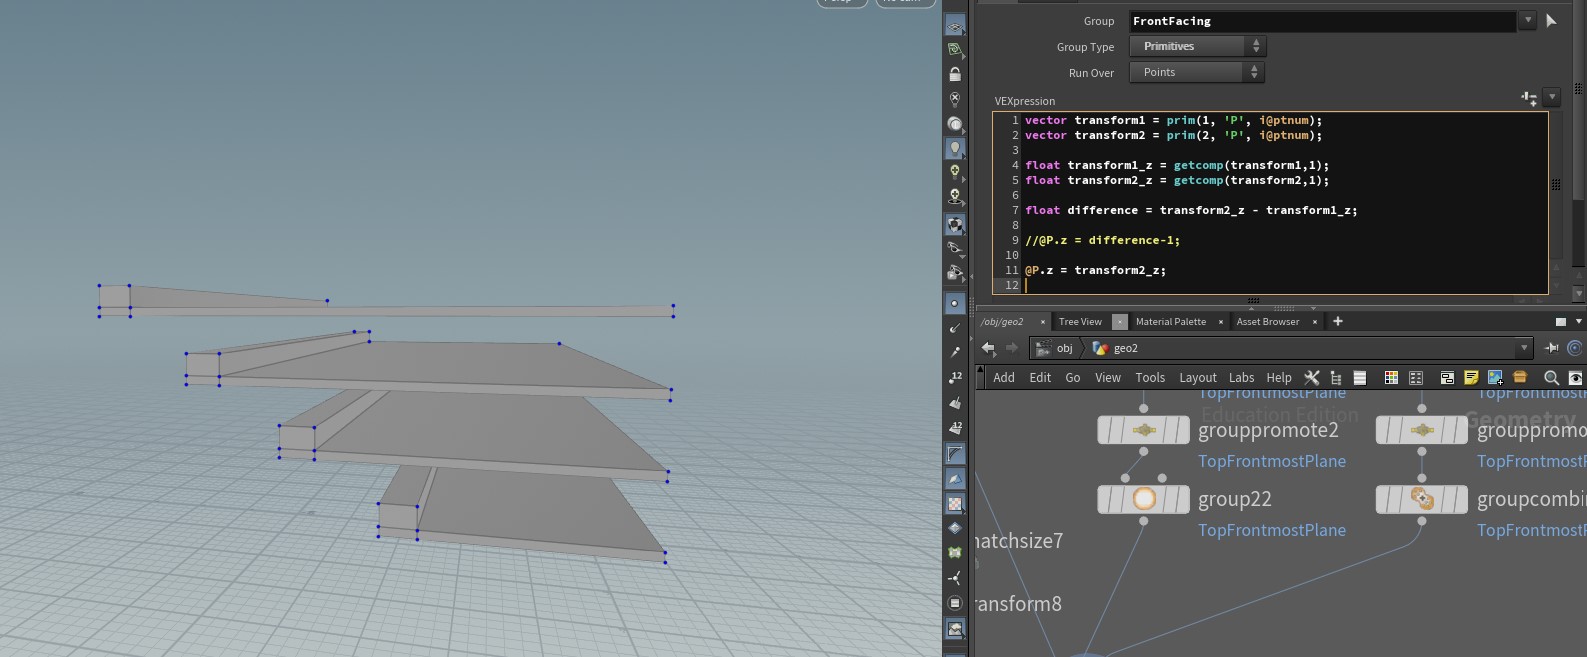
In order to solve this I implemented a neat system using the Match Size node. I want to give a special thank you to whoever at Side FX created this wonderful node, because in this project it is used a total of 46 times.
Seats
I decided that the seats would best be handled by instancing a model in Unreal. This so the user did not need to use any input and could use the tool faster. The seat model was created in Maya and instanced to points assigned in Houdini.
UVs
This one was pretty complicated, but ended up having a fairly simple solution. I knew I was going to have to use multiple UV sets due to the scale of the model. I also wanted to make sure that the scaling of certain elements would not affect the scaling of other meshes UVs. I also had to consider how each of these UV sets would be defined.
Like my fence project I ended up utilizing a UDIM tile set. They make creating multiple texture sets in Houdini much easier. To assign them I created a Name attribute for each texture set. I then put this attribute node under the meshes that I wanted assigned to the set. For example: having all the columns being in one texture set. I then used a For Loop and assigned the texture set to a UDIM tile based off the loop iteration. For Example, for the third texture set would be in the 1004 UDIM spot (1001 + 3 Loop iterations).
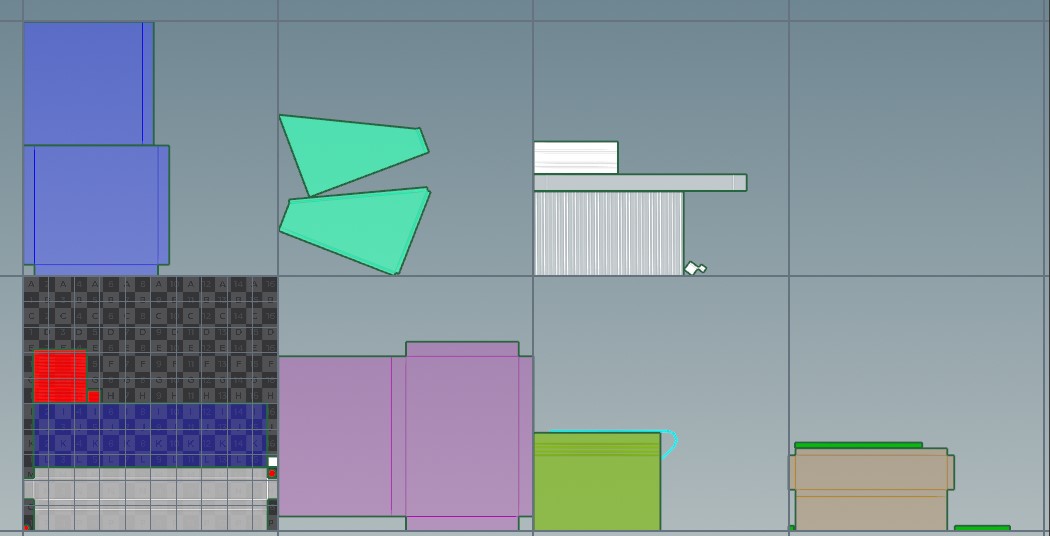
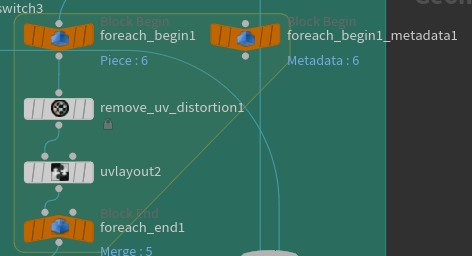
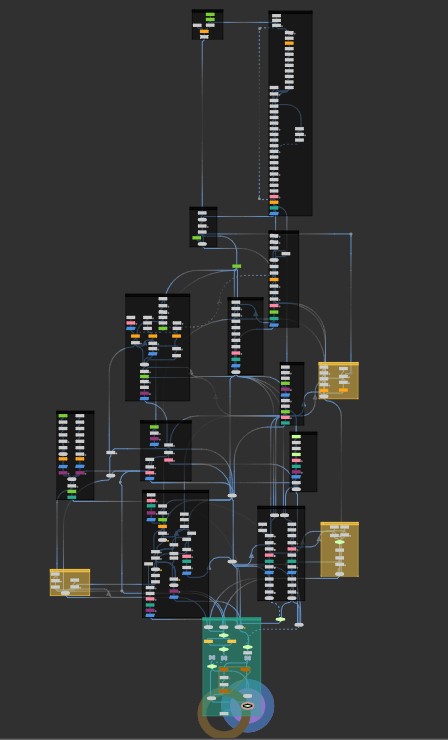
Node Graph
Lastly here is a photo of my node graph from Houdini and the HDA parameters. The orange groups represents Collision creation, the blue nodes are materials being assigned.